If you are using Kayak for fishing and not using a good fish finder, you miss out a lot. Why would someone miss the chance to bag a shoal of fish when it takes nothing but proper equipment and the knowledge to use them accurately?
Fitness: 4 oefeningen om snel af te vallen na 40 – Panorama methyl tren quarantaine: drie accounts om thuis, online en gratis te sporten.You will be amazed after knowing how advantageous a kayak is for anglers. Adding a good fish finder to it will do nothing but increase your productivity. How to install a fish finder? Well, look no further. This is precisely where you get all your queries answered.
True that selecting the correct tools for installing a fish finder is a bit of work, but hold tight and keep reading as you are going to learn about anything and everything you need to know about –
- The functionality of a Fish Finder.
- How to make the best use of your Kayak?
- Best fitted Fish Finder for your Kayak
- Tools required for installing a Fish Finder on Kayak
- Steps to Install a Fish Finder on Kayak
Table of Contents
How Fish Finder Works:
People who do not have a faint idea about fish finder or how to install a fish finder, read more carefully to understand how it works and why it is so essential for fishing.
Sound Navigation Ranging in short (SONAR) is a device that sends a pulse of sound waves underwater. When these waves strike with the bottom of any solid objects like fish or vegetation, they reflect it to the surface.

The device measures the time required for the waves to undergo the whole process of hitting anything to bouncing back to the surface of the water. The strength of the returning pulses is measured and converted into electrical signals. It enables the anglers to understand the depth of the object or the hardness of it.
We should consider the fact that the objects that are just underneath the water surface are not always caught by our SONAR waves and remains undetected. This is known as surface clutter.
The fishes below the surface clutter zone easily reflect the sonar pulses and are detected by the fish finder device. Hence, it is displayed on the fish finder app. This working process may also let you understand how to use a fishfinder on Kayak.
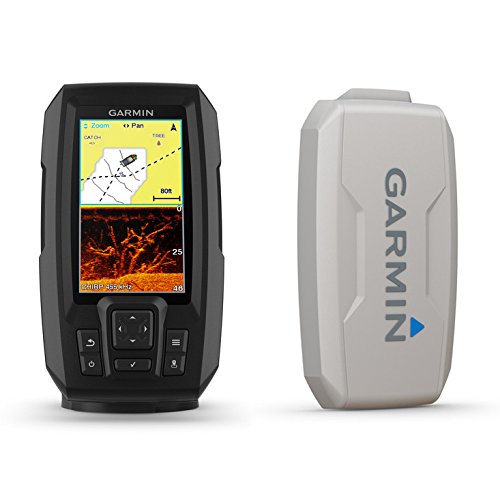
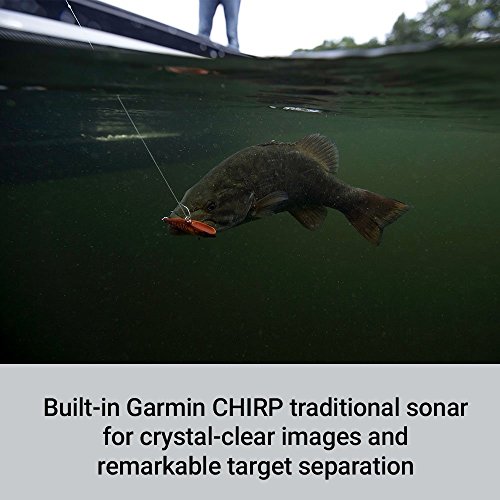

- Includes transducer for built-in Garmin CHIRP traditional sonar plus CHIRP ClearVü scanning sonar
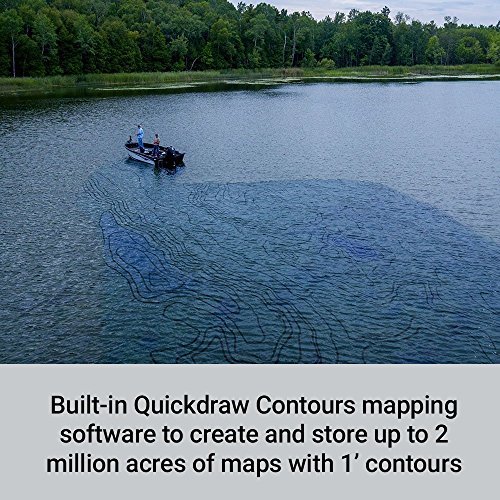
- Built-in Garmin quickdraw contours mapping software lets you create and store maps with 1’ contours for up to 2 million acres
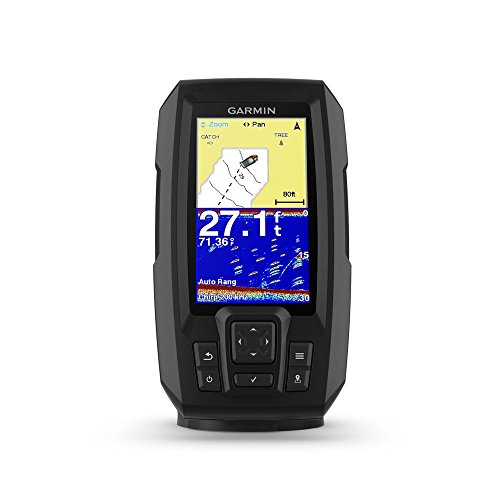
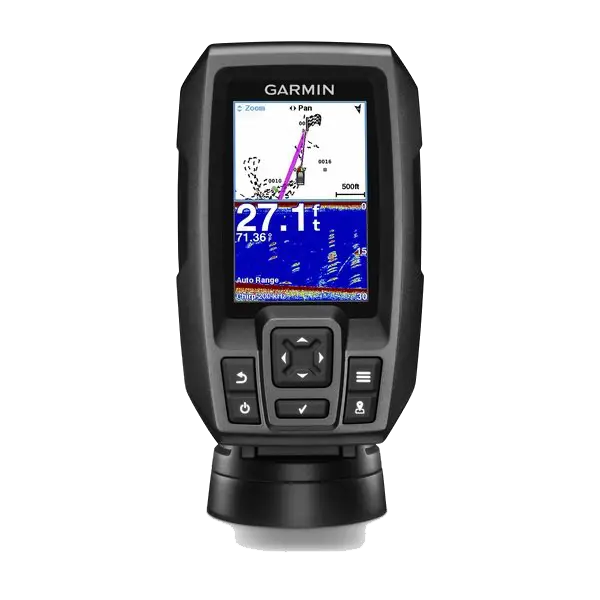
- Built-in GPS lets you mark waypoints, create routes and view boat’s speed
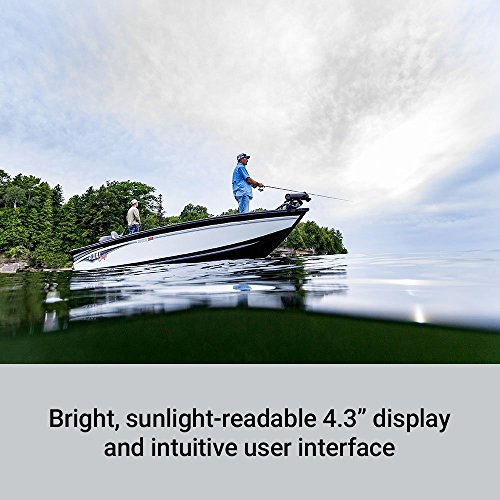
- Bright, Sunlight-readable 4.3” display and intuitive user interface
- Rugged design for every fishing environment
Prices pulled from the Amazon Product Advertising API on:
Product prices and availability are accurate as of the date/time indicated and are subject to change. Any price and availability information displayed on [relevant Amazon Site(s), as applicable] at the time of purchase will apply to the purchase of this product.
How Kayak Works:
A kayak means ‘hunting boat.’ It was created mainly for fishing and hunting. Kayak is a double-bladed paddled narrow watercraft. To understand how it works and helps fishing extensively, one needs to follow the next sentences carefully.
There is not much little difference in kayak fishing. It is almost the same as fishing in other water-boats. The difference is mainly in the set-up of equipment fitted on the Kayak. The activities that are carried out on such a small watercraft are very unusual.
Modern kayaks are equipped with many accessories like anchor trolleys, rod holders, electronic fishfinders, and live-bait containers. Anglers target fishes like snook, red drum, seatrout, tarpon, halibut and cod and pelagics like amberjacks, tuna, sailfish, wahoo, king mackerel, and even marlin.

Jigging or fishing can be quickly done through small boats. But it is no doubt active surfing on water requires the speed of five to ten knots, speed more than the range of someone’s paddling.
Soft baiting is another effective method of fishing that emerged from kayaks. Plastic soft lures or rubber in the shape of baitfish are a good idea to catch fishes. This is a widespread method
This method is the predominant method now used, particularly in the Southern hemisphere, as it reduces the need to take messy live baits on board the Kayak.
Anglers do have much fun when they release kayaks from large boats/ ships offshore so they can fish from the Kayak. It is more exciting when they catch a fish that fights the hook and swim in the opposite direction pulling the Kayak through the water.
These days’ anglers target gamefish like tuna, tarpon, swordfish, snook, redfish, salmon, and trout. As these fishes are available in freshwater, they prefer moving to inland lakes and rivers.
The benefits of kayak fishing are that they are easy to use, and the equipment used to run a kayak is affordable compared to boats that are motorized. Moreover, they are eco-friendly and well paddling is undoubtedly a good exercise. You can go fishing like a pro if you know how kayak works and how to install a fishfinder.
Which Fish Finder is best for your Kayak?
Choosing the best fish finder for your Kayak is a bit of a task. Picking up the perfect fishfinder needs you to consider some different factors than buying a boat. This article will help you know about some of the best performance kayak fish finder kits. If you already know how to install a fishfinder, picking out the best fishfinder can give you the best performance. Read further to know the two best kayak fish finders that can work best for you.
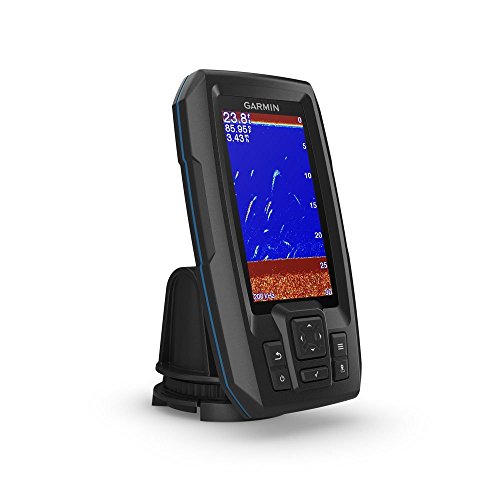
Garmin Striker 4
It includes an incredibly easy to use interface, with a full-hued 3.5″display screen, CHIRP sonar, and sharp 77/200 kHz transducer. It also accompanies a built-in GPS, allowing you to set waypoints, explore courses, and imprint various structures, such as dropoffs, rock heaps, or any submerged deterrents. You can check out the Gramin Striker 4 review to know more about its features and quality.
The Striker 4 fishfinder accompanies a double presentation capacity to set two screens, one next to the other. This permits you to handily see your waypoint guide and the peruser in a similar showcase or to see both the 77 and 200 kHz flags for a fuller submerged perusing.
Humminbird Helix 7 Chirp DI/GPS G2
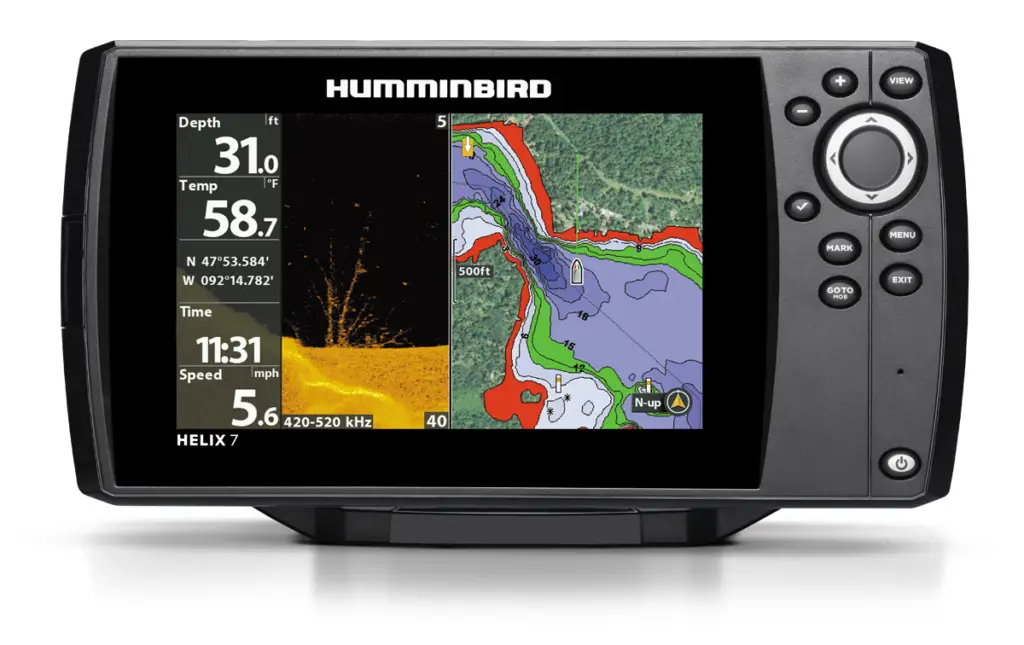
The GPS mode is precise because of the diagram plotter plan. That is why you can call it best fish finder GPS combo. It is enhanced with MSAS, EGNOS and WAAS advancements. Accordingly, it can give proficient outcomes inside 8.2 feet.
Simultaneously, it will subtly give some other GPS will, such as the speed of your Kayak. You can store newfound courses – up to 45, just as 50 tracks. There are more than 20,000 focuses mininum each track.The licensed UniMap bundle covers waterways, lakes, and the coastline. The GPS is good with frameworks like Navionics Platinum+ or LakeMaster PLUS, among a couple of others. The SmartStrike similarity isn’t to be disregarded either. There are a lot of users that have given the Humminbird Helix 7 reviews, you can go through them for better understanding.
Tools required for Installation of Fish Finder
It is clear to us why a fish finder is crucial in the run of fishing and a kayak. If an angler knows how to install a fishfinder, he must also know there are specific tools necessary for you to have with you when installing a fish finder. Now we will go through the tools required to establish a fish finder in the Kayak.
- Power drill
- 1/8-inch, 5/32-inch, and 1-inch bits
- 3/8-inch socket wrench
- Screwdriver
- Wire stripper
- Soldering iron
- A heat gun or hairdryer
- HobieFishfinder Install Kit III
- Lowrance Fishfinder/Chartplotter
- Yak Attack Gear Track
- RAM Full-size fishfinder mount
- Spare Hobie through-hull fitting
- 1/4-inch and 1/8-inch heat-shrink tubing
- Solder
- Zip ties
- Electrical tape
- Dielectric grease
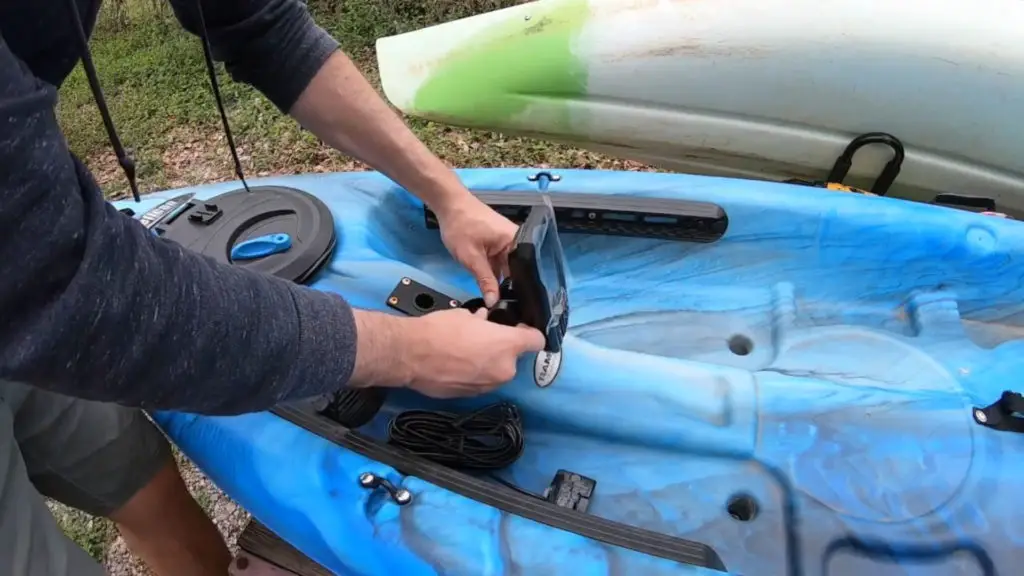
Steps to Install a Fish Finder on a Kayak:
Let us dig in and know the step by step process of how to install a fishfinder in your kayak.
Step 1: Register the Fish Finder
The very first step to working on your boat is making sure that your fish finder is registered. You need to contact the fish finder manufacturer to get you registered. The fish finder’s manufacturer can only reach you when they have your e-mail in their system. Registering with the manufacturer is essential because while working from the fish finder if you face any issue, you can contact them and guide you. Registering will also ensure that the manufacturer gives you regular updates and alerts regarding the fish finder so that it works properly.
Step 2: Good Power Supply
Secondly, they have a steady power supply. To get a better image quality in your kayak transducer, you need a good battery. You need kayak fish finder battery install because, without a constant power supply, your image might crash. Also, it might cause some problems with your sonar device.
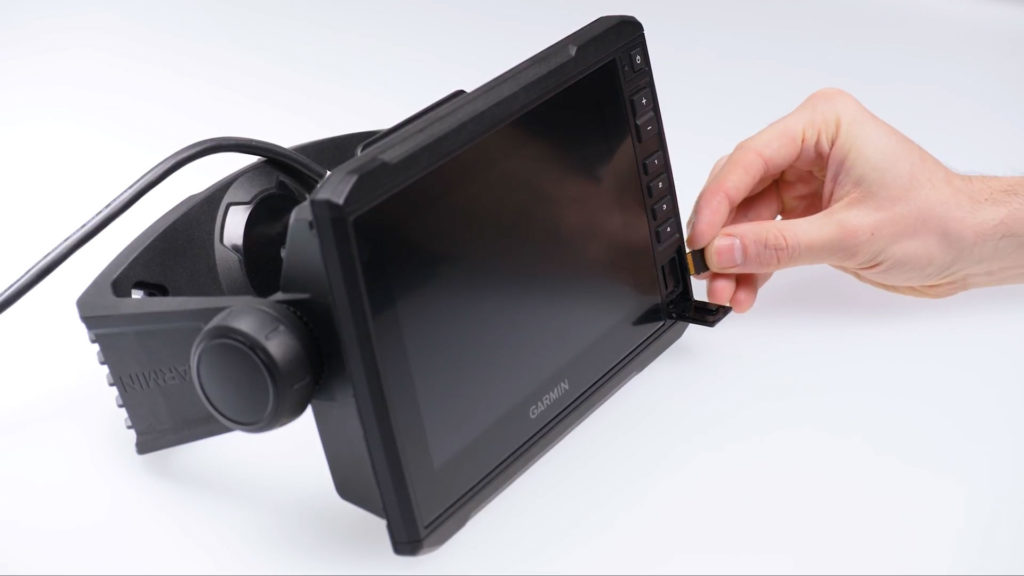
Step 3: Update the Fish Finder Software

When you get the fish finder, the first thing before using it should be updating the software. Some fish finders have micro SD slots. You can use a memory card to insert in the fish finder to help you increase its memory. Also, formatting the SD card before entering is a crucial step. When you take these steps to update your fish finder, you will be able to use it immediately.
Step 4: Install kayak Attack Gear Track
With the help of 1/8 inch bit, drill a hole. Now place the Gear Trac over the hole and tighten the first screw. On the opposite corner, drill another, i.e., the second hole, and likewise tighten the second screw. Now drill the rest two holes using a 5/32-inch bit. Then screw in bolts.
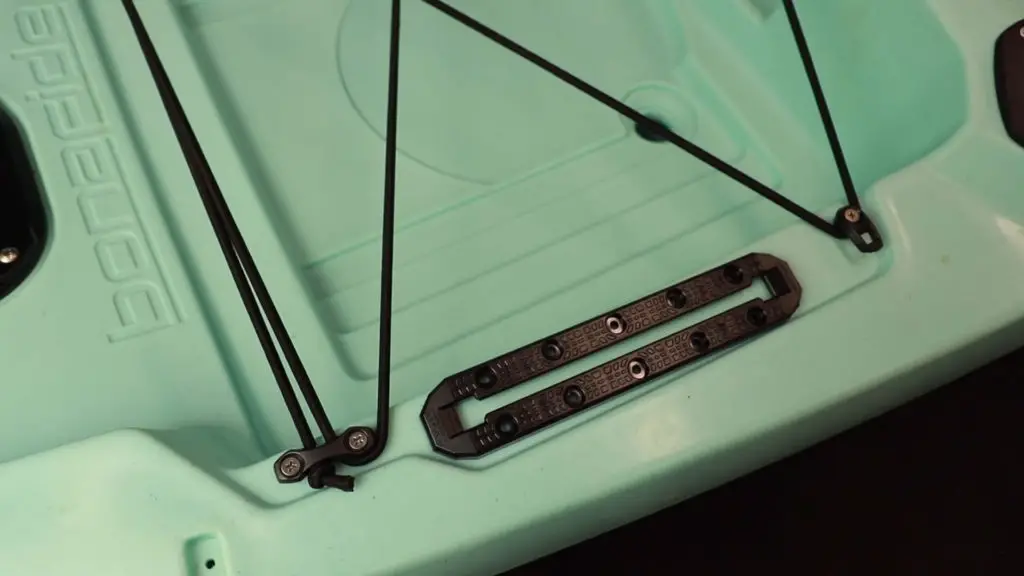
Keep in mind all the holes should be drilled smaller than the screws or bolts. Because when the threads bite into the plastic, they’ll form a waterproof seal. Now go to the front hatch and slide washers onto the pins. Tighten nuts using your hand, then tighten them using a socket wrench.
If you have someone to help using a screwdriver, it will keep the bolts from turning as you keep tighten he nuts.
Step 5: Install Transducer
At first, remove your seat and flip the boat upside down. Remove the Lowrance-ready transducer plate. Now thread the transducer wire through scupper and attach the transducer to the bracket.
Do not forget to keep a little space between the transducer and the bracket. It will ease the functioning properly. Screw the plate into the hull.
Step 6: Run Transducer Cable into Hull
Now flip the boat upside right. Open the hatch in front of the seating area and remove the foam floatation block. Reach through the hatch to remove through-hull fitting by twisting off the fitting nut and popping the joint out of the hole.
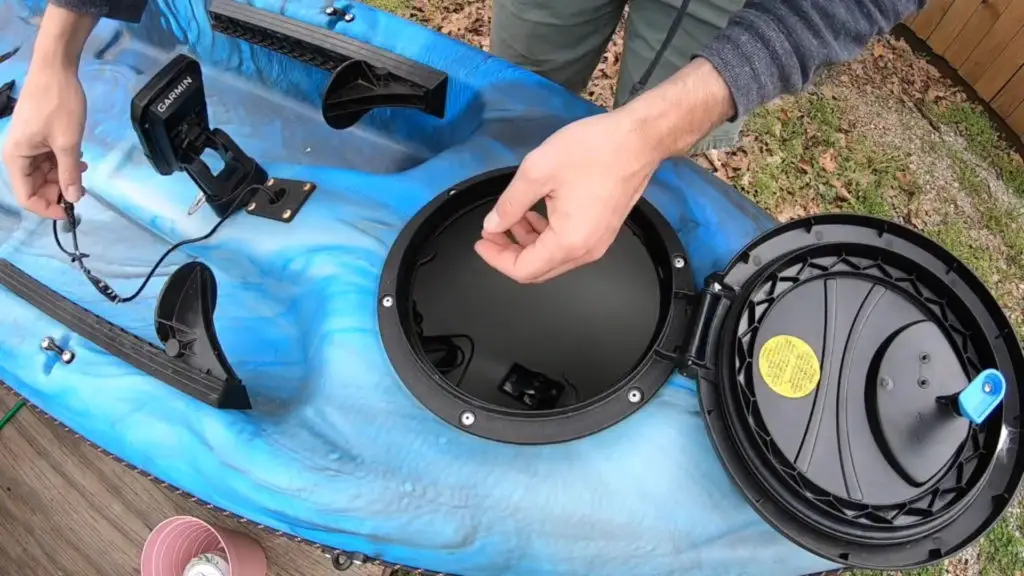
Place rubber O-ring over the hole—thread transducer cable down through O-ring and shaft. Pull the cable out through hatch until tight. Pop rubber gasket out of the through-hull fitting. Pop it onto the wire. Pop the right gasket onto your transducer cable, then use a screwdriver to push the gasket into the through-hull fitting. Push through-hull fitting into the hole—slide through-hull fitting nut over and up cable. Reach through hatch and twist nut until tight. Replace foam floatation blocks. Your kayak transducer mount may be ready to go.
Step7: Hook up the system
You can now put your fish finder on the top of your boat. While you take your wires and hook them up, you need to make sure that your fish finder’s battery is off. You can turn on the power after hooking it up. The wiring hole behind the binnacle mount has to be sealed, and you can use the silicone sealant for it.
After you finish hooking it up, make sure that the fish finder gets the power. If you are unable to power it on, check the proper connection of all the wires. Your sealant should be dry so that your boat does not sink. If you do not face any issues for a weak, you are good to go!
Precautions
There are some precautions you need to keep in mind even if you have complete knowlegde of how to install a fishfinder, to avoid any lack of performance of your fishfinder. Let us look at a few of them.
1. Check the weather ⛅
The fish count is profoundly affected by weather change. You can catch more fishes if the temperature is high. If it is high, you may not be able to find them because fishes will go deep underneath the water at such temperature.
2. Learn to manage the sensitivity of the fish finder
You need to find out the setting of fishfinder sensitivity that helps you hit more fishes. You need to increase the sensitivity by switching off the automatic mode. This will show you more information on your screen.
3. Use different types of Baits
Bass can depend on various circumstances like weather. If it is clear water, you should use the red colored lure or flashy colored lure. It is a recommendation to use live bait to catch a broad mass of bass.
Why should you consider installing Fish Finder on Kayak
Only knowing how to install a fish finder is not going to help, unless you know why is it important for you. A fish finder helps you to find the bait. With the help of a fish finder, you can eliminate the water with no bait and no active fish.
The fishfinder can also allow you to look for the bait schools and the nearby feeding fish. It will also help you know at what depth of water the fishes are and what baits and presentations will work for you. There are several other reasons why installing a fish finder in your Kayak will be helpful.
Fish Finder shows you the habitat.
Habitat for fishes is their home. The fish finder will help you to know where you can find the fishes. Be it a large fallen tree, an old tank, a roadbed, or a crumbled house structure; you can find them anywhere with the help of a fish finder.
As the fishes are deep underwater, therefore, the fish finder is the only way to spot the spot of the wishes. Some fish finders also have best marine GPS technology, so you can mark the fish habitat and visit there again and again.
You can measure the temperature through the fish finder.
You need to know the temperature of the water because it affects the fish count. Therefore, installing the best fish finder app can help you measure the water’s cold, and you can go fishing according to that.
Conclusions:
Now that you know how to install a fish finder, you need to keep some tips in mind for the best performance:
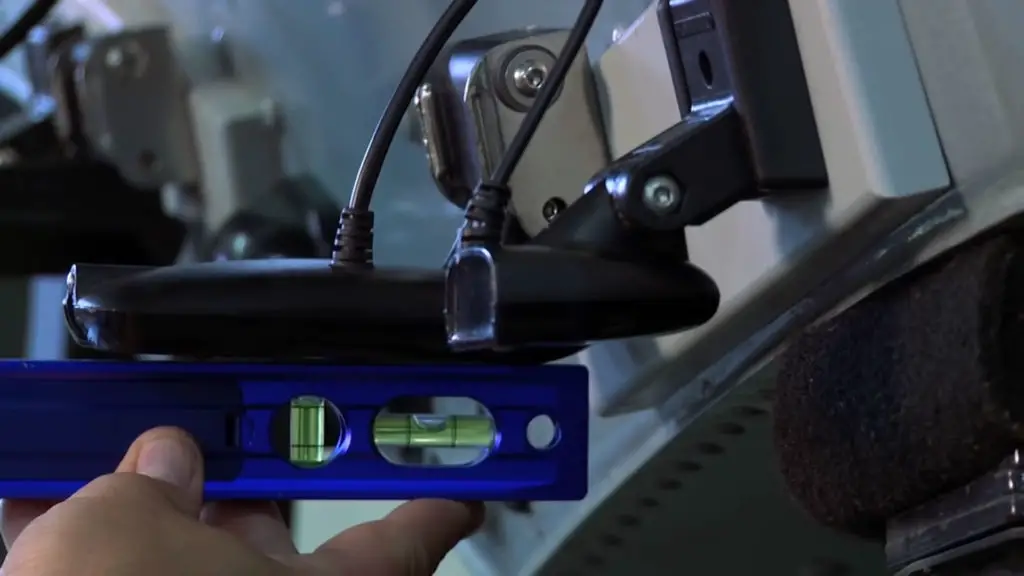
- You should make sure that the transducer is as close to the centerline of the boat of the engine as possible. But you should also make sure that it is no s close that it gets constant interference from cavitation.
- The location on the transom should be visible from both sides of the boat without any interference. The things that can interfere may be the outboard motor, floatation pods, shallow water anchors, etc.
- Make sure that the transducer is in contact with the water at all times. You should see it carefully because even if the sensor is one inch up or down the water level, it can lead to a big problem.
- You need to adjust the transducer’s angle because when people sit in the boat, the level is affected. You also have to consider that the back of the boat is lower in the water as compared to the trailer.
If you want the best performance of the fish finder, you should make sure that you accurately follow all these tips. If you are not getting the right images after the installation, look into these common issues. Then, you may get better performance. Once you have completely understood how to install a fishfinder and have got the best performance, interpret what settings work right for you.